Getting good pictures depends on a wide variety of factors, including how much you know, what kind of camera you are using and how much you know about using it, plus an “X” factor of natural ability to visualize what you want to create. Most people who are interested in photography go around and “snap” photos. This has become all too easy these days with cel phones and pocket cameras that do all of the technical work for you and generally crank out something that is at least properly exposed and has decent color. Just those two things were enough to drive people crazy in the early days of film!
However – if you want to go beyond that, even with a point and shoot camera, you can. To do that, you just need to think a little more like an artist, and not get so involved in the mechanics of the camera. Below are some basic attributes of the “photograph” and what controls them. It is the very basic elements that make a camera do what it does – and so although extremely basic in a certain sense, they are also extremely important and often just plain overlooked when out “snapping” away with an all automatic camera. Knowing these basic ideas will give you something to think about when taking pictures – and ultimately allow you to think ahead of time of the photo that you would like to get and how to go about getting it, which is really the whole point. Paradoxically, you must know the mechanics of your camera before you can get past them in the first place.
Take VS Make
Just to make clear what was stated above, let’s take a quick look at the difference between “taking” and “making.” Most people with a camera are looking for shots that are “ready made” – just waiting for someone with a camera to show up and snap the photo. The reason that this is so appealing has its roots in several different areas. First, it’s obviously easier than actually having to create something. But more importantly, the media has a tendency to romanticize the process – and we naively buy into it. There is a certain appeal in the belief that if you have that great camera that you bought – that you’re going to suddenly see all of these great photo ops that you otherwise would have missed, and be at the right place at the right time to get them. Now don’t get me wrong – this does happen. But more times than not – there is a lot of thought, preparation and work involved in getting that perfect moment. This is also why just because you have a capable camera doesn’t mean you will get any good photographs.
“Red and Black” – Canon G2
So the point of this segment is to get you thinking a little more about what tools you have – both inside and outside of the camera. A classic example of “making” vs “taking” is the very famous photo taken by Galen Rowell (my hero) of the temple in Tibet at the end of the rainbow. In case you haven’t seen it – it is one of those classic incredible “luck” shots in which a rainbow has appeared – seemingly ending right at the temple. The real story is that, seeing the rainbow appear, Galen thought to get a picture of the temple at the end of the rainbow – and so then ran over two miles to line up the shot (he was a marathon runner). There was not much luck here, other than the rainbow itself lasting long enough for him to get it lined up. Nine times out of ten great shots don’t just happen – they are made, using whatever tools are available, which might not have anything to do with the camera itself. Another famous story is of a National Geographic photographer placing a colored candy wrapper over his lens to get a reddish silhouette of his subject.
So while some of the topics below may seem rudimentary if you’ve been shooting for a while, take a moment to review them and to really think about them in the context of making a photograph. Sometimes the simplest concepts are the most important.
The Frame
Puget Sound at Sunset – G9 Composite
So like any artist – we must begin with the idea of a frame. All cameras come with this as a standard feature – it’s either the viewfinder or the screen on the back. As mentioned in previous posts – some cameras allow you to alter the ratio of the frame, so there is some control over this in the camera, but I always suggest that you use whatever covers the whole chip and then crop later if necessary.
The idea of the frame though, is really the idea of composition. There are a whole slew of “rules” that people have come up with regarding what makes a “pleasing” composition. However – for every rule, there are great photographs that break it. And so with composition there is a little of the “X” factor going on, as you really can’t teach it. You either have a knack for good composition or you don’t. The best thing is to take a lot of pictures and look at other’s photos that you like and study what it is about the composition that works (never mind the subject – we’ll cover that later). A good rule of thumb is to crop out anything that is not telling the story. Simplify.
One thing I have learned in my years as a photographer is that often the best composition of the print I am making didn’t happen when I took the photo. Playing around with composition on the computer will teach you loads about what works and what doesn’t. When I was making silver prints in the darkroom, I would always crop the negative ten different ways to see what worked best before committing to making a print. After doing this for a while – I became better at getting a good composition directly in the camera as I was taking the picture. With digital – you can easily do this as you are working with your subject. Try many different combinations and crops in the camera – you can always just delete what you don’t like.
Do not discount the importance of the frame! It is one of the most important aspects of photography. A lousy composition of an intriguing subject is still a lousy photograph. Poor framing of an accurately exposed and color correct subject still makes a lousy photograph. All of the mechanical automation in the world isn’t going to frame the subject for you – and so this becomes one of the defining factors in photography. Separating a good photograph from the rest – all other factors being equal – can be easily done just by composition alone.
Here’s a hint worth considering. Don’t let the camera’s frame limit you. Even though the camera’s frame isn’t a square one for instance, doesn’t mean you can’t frame up what will in the end be a square framed photograph. The same can be said for any configuration you might choose. The frame of the camera is just there by default to put a boundary on the image. It has to be there obviously, so use it to contain your image in a way that best suits your subject – and consider cropping it later if the default frame is not what would suit it best.
Original file – Radio Flyer, Canon G9
Cropped Image
Another obvious framing tool is the lens itself. Different focal lengths will create a different frame, and most point and shoot cameras have a generous zoom range built in. If you have a fixed lens camera such as one of the Fuji X100 series, no worries, you can still change the framing by repositioning your legs!
The Subject
I am hitting the two most fundamental ideas here first – frame and subject matter – because they are the two that manufacturers have absolutely no control over. They would like to have some – believe me – but until they create a robot camera with a computerized brain that functions better than yours then you are still in a position to actually decide where you would like to point the camera and what to focus it on. Most people have the wrong idea that a great subject will carry the photograph. While that might work in rare instances, in reality, it’s how the subject is rendered that is most important. Still, though, there must be a subject for the viewer to hone in on – so it is important none the less.
Mud People, 2011 rainbow gathering – Canon G9
So deciding what the subject is going to be is an important aspect of getting a good photograph. No one wants to view a boring subject – no matter what it is. Imagine a photograph of a clear blue sky – with nothing in it. There is a subject, the sky, but with nothing more than that going on, there is nothing to capture the interest of the viewer. The eye always goes where there is the most interest. Add a few clouds to the sky shot – and now they become the subject. Add a hot air balloon and now it becomes the subject. Add a buxom lass hanging out of the balloon basket and now she becomes the subject and so on.
The more interesting your subject, the better response you will get from viewers. Mind you that virtually any subject can be interesting depending on how it is photographed. This creates a bit of a paradox for this topic, in that I am advocating both ideas, i.e. interesting subjects capture the interest of viewers, and any subject can be interesting if photographed properly. Let’s face the facts, though. A really good subject is easier to photograph well and is more fun to shoot. Shoot what interests you – no matter what it is, and figure out how to do it in a way that will engage your viewers. Pros get paid to make boring subjects interesting!
So in combining these first two topics of frame and subject, one gets into the heart of what makes a good photograph – and (surprise) – it hasn’t got anything to do with the camera you’re using. Just as an example, let’s take a look at a very familiar subject – the human form. I spent years in Los Angeles shooting nudes, and it is a very compelling and interesting subject, both to photograph and to view. One of the reasons for that is that there are so many variations to be had just in the framing part alone. Think of all of the ways one can render the human form as a photographic subject. Even without getting into lighting or poses, there is enough interesting features to work with that one could go a lifetime just shooting different people and playing with the framing! So that would be an example of a potential subject that would interest viewers. Mind you, any subject can be made boring depending on how it is treated (yes, even nudes).
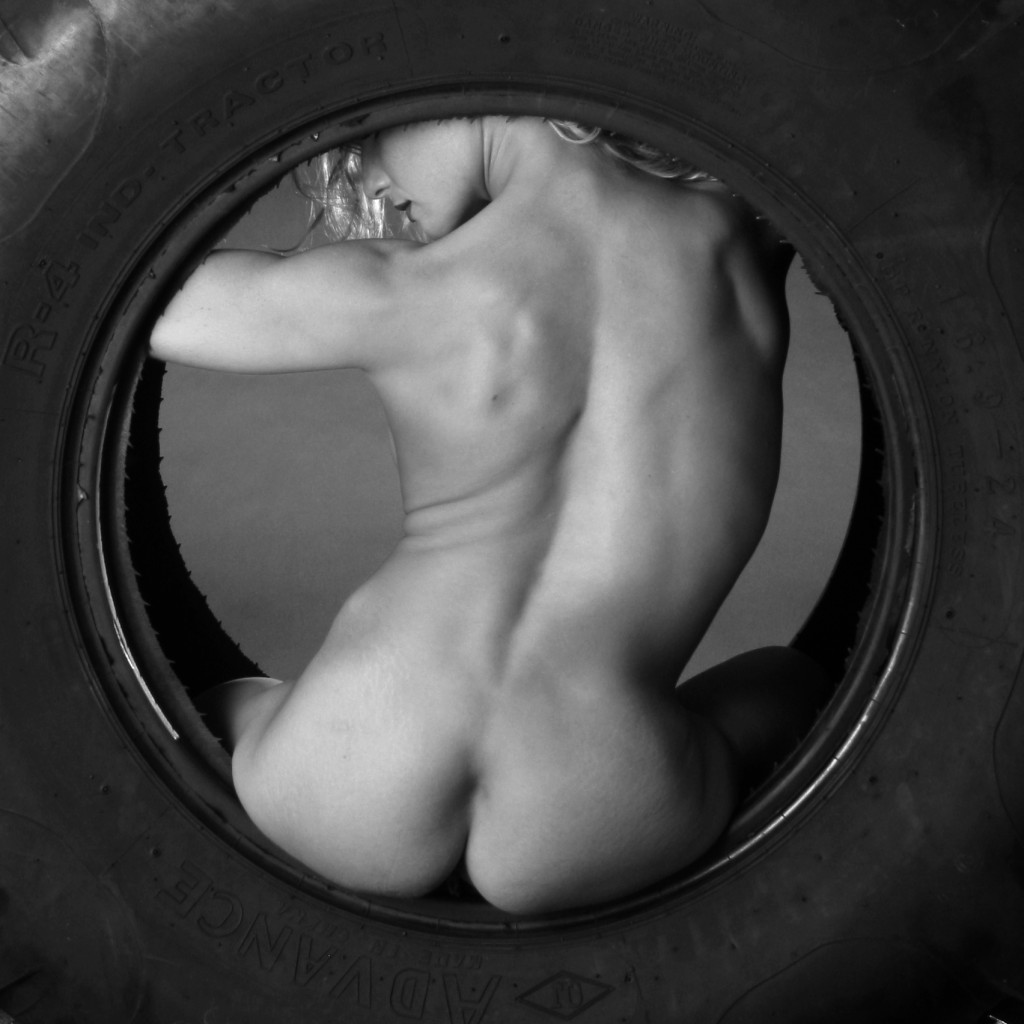
Shot in the studio with a Canon G2
Before the days of digital, there was a certain mystery as to what would be the final result that came back on the film after photographing something. It took me many years and hundreds of rolls of film before I got to the point where I could “see” in my mind exactly what the film would look like even before I took the photograph. What I discovered was that often times, the weakest aspect of the picture I was framing up was the subject. There was a time when I would shoot a whole role of film just to get one good shot. Later on, I was able to simply pass on taking the photograph unless there was a compelling enough subject to warrant the cost of the film. With digital, there is no such learning curve – and so most people are just blasting away at things that are not compelling enough to make a good photograph. Consider what you are photographing! Then, frame it up in a way that enhances its interest.
Light
We couldn’t have a discussion of the basics of photography without recognizing the main element upon which the whole medium is based. Light.
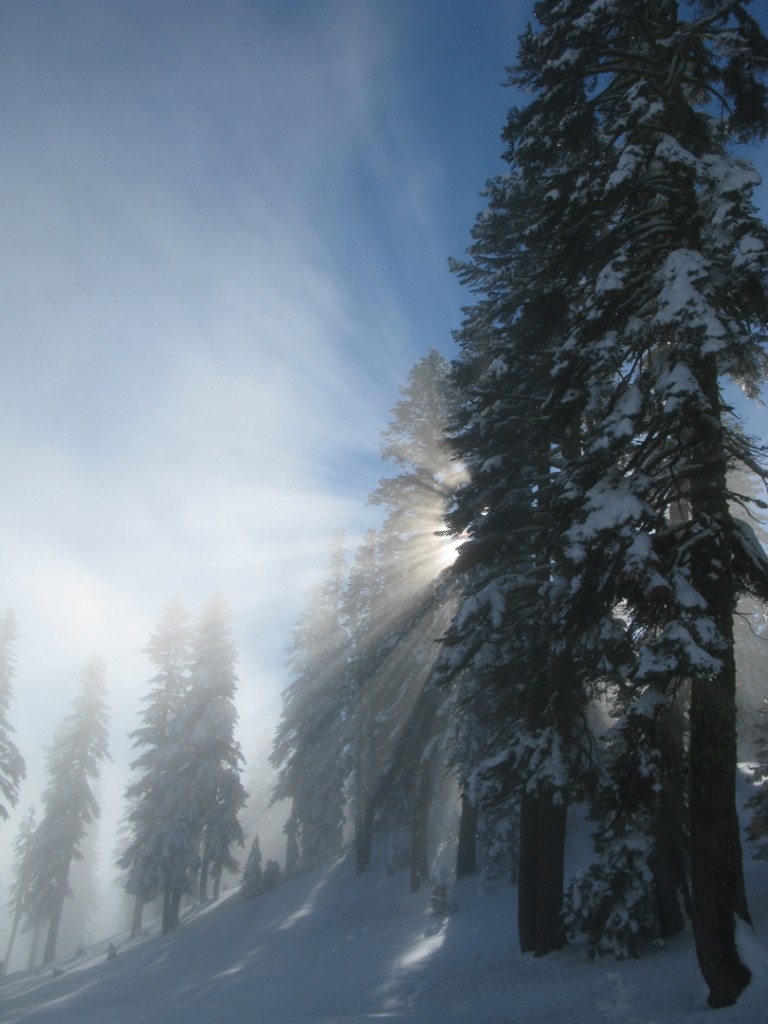
Sunbeams – Canon G9
When you raise your camera to take a picture – there has to be something to snap, the subject (as discussed) and that subject will need to be illuminated with light for there to be anything to see in the picture. While this is an obvious concept – it’s also fundamentally important. So important that without a full understanding of it – you won’t be in a position to use your camera to its best effect. So let’s take a look at this concept in a little more detail than we did the previous two topics.
Did you know that light has only two fundamental characteristics as far as illumination? Regardless of color, or intensity or just about anything else – light will always be either direct or diffuse, hard or soft. There are of course infinite variations of these two attributes – but they are the fundamental characteristic that you need to know to understand light, and how it affects what it falls on. While I am not going to go into too much detail here – I did want to share with you a few of the ways that you can use these characteristics of light to your advantage, depending on the circumstances.
Direct or “hard” light comes from a point source and creates bright colors, high contrast and deep shadows. This is the classic “sun behind your right shoulder” advice you got when you got your first camera. Most things just look better in direct light. What hard, direct light does is create what is referred to as “high specularity” on a smooth surface – creating glare, or shiny spots. This can be a good thing or not, depending on your subject. As an example – direct sun is not a good source for taking a picture of a shiny car, as it will just create a small pin point of glare on the surface, without showing what is really there. If the car is part of a larger scene though – it could be the best light for that scene, even though a car is involved.
Indirect or diffuse light comes from a large source, and creates more muted colors, low contrast, and light shadows or none. This can be great for certain subjects, like portraits of people, shiny cars, and anything that has a smooth, non diffuse surface. Soft light wraps around its subject, and will create contrast and shadows in direct proprtion to the size of the source in relation to the subject. So unlike a direct source, a large diffuse source will wrap itself around a subject such as a car, and the shiny surface of the car will be reflecting the large source – creating a more natural look, and revealing more of the curves and details of the body design of the car. So in certain cases – such as this one – it can be counterintuitive. Your first response might be to “put the sun behind you” when in fact, a better shot might be to use the sky above and the light reflecting off of the concrete below as the main source of light on the subject, and use the sun as a backlight.
Think of this concept in terms of shooting a portrait. What if all you have is a bright sunny day, and a subject standing next to a white wall? Knowing what I have described above, you might put your back to the white wall, and allow that to be your diffuse light source, and let the direct sun highlight the subjects hair.
So by pointing out the two different characteristics of light – I am hoping to get you thinking differently. By understanding how light affects what it falls on – you will begin to get a sense of what would look best for your particular subject. Sometimes you have ultimate control – such as in a studio, but when using a pocket camera in the field, you have to improvise and think on your feet.
Here is another fundamental concept you need to know about light. Have you figured out what makes light direct or diffuse? Again – this is a counterintuitive concept. You might think it is intensity, or whether it is being filtered through a diffuse material, but both of those answers are incorrect. I have hinted at the answer earlier. It’s size – nothing more.
As an example – let’s take the sun – a pinpoint of intense light in the sky. This is obviously a direct, hard source of light. But now – let’s take a quick trip in our personal space vehicle (you do have one of these in your garage, don’t you?) and travel all the way to the sun, coming right up to it within a million miles or so. What is the quality of the light coming from the sun now? Is it still a point source? Of course not – now it is a wall of light 100 earths high! At this distance – it is a soft, diffuse light with no shadows (albeit intense). The quality of the light changed – but the source did not.
The only thing that changed was the distance of the subject in relation to the source, and the size of the source in relation to the subject.
This is the big secret to understanding light!
Get it? The whole thing is about size and distance – that is all that really matters. I can put a 1 million watt light bulb into a 20 foot soft box and perch it up 100 yards away from my subject, and the result would be a pinpoint, hard, direct light source. The fact that it is coming from a “soft box” makes absolutely no difference at that distance. Bring that source within 20 feet of the subject, though, and you have a whole different story.
For you DSLR users, consider that diffuser gadget you just purchased to make your on camera flash “soft.” What is it really doing? The answer is that it is scattering the light from the flash, which then has an opportunity to reflect off of walls and ceilings and so appears to be a softer less harsh light source. And to a small degree, particularly if the surface of the diffuser is larger than the front of the flash unit, it is. But take it outside in the dark, and at a fair distance, and there will be very little noticeable effect. Bring it in close for a macro shot of a butterfly, though, and then you’ll see a noticeable difference if the surface area is larger.
Obviously, the on camera flash on a small digital camera will always be a point source, hard light, and will do a fairly good job of filling in your subject when necessary. Just don’t forget to look around at all of the light sources available to you – both hard and soft, and how you might be able to use them to your advantage. Nature (and man) provides a plethora of surfaces, sources, and mixes of both hard and diffuse light. It’s all in being conscious of what ‘s available to you and how you use it that makes the difference. Now you know!
There are two more attributes of light that we should briefly cover: color and intensity. Light can be any color, even invisible as infrared or ultraviolet, both of which can effect your final image. Your digital camera will have a white balance function, and what this does is balance the color of the light to your liking. The color of light is referred to as a temperature, which is a reference to the color of a piece of metal being heated from red to white hot.
Lower temperatures are more red, higher temperatures are more blue. Regular daylight has a color temperature of about 5500 to 6000K (the K stands for Kelvin, a unit of measure) and this is what your daylight setting on the white balance menu is referring to. You are actually balancing the color temperature of the light you are working with to about 5500K or normal daylight color.
This means that when it is cloudy outside, the color changes to a higher temperature, creating a blue cast in the photo unless corrected. Changing your white balance to “cloudy” ads red and corrects the temperature back to 5500K. Likewise, an incandescent bulb creates a red cast, and setting your white balance to “incandescent” (or tungsten) adds blue raising the 3200K temperature of the light bulb to 5500K. This is a basic idea of what is happening with white balance. So understanding this idea, one can choose to warm up a photo using the white balance function, by setting it to “cloudy” on a sunny day for instance, or cool down a photo by using the “daylight” or “tungsten” setting on a cloudy day etc.
The left image has a WB of “daylight,” and the right has been warmed up with a WB of “cloudy.”
In the old days, photographers controlled this by placing filters over the lens of the camera. With today’s digital cameras, you can do the same thing by adjusting the white balance on the camera. Understand that when the white balance function is set to “auto,” the camera will attempt to correct the scene to daylight temperature of 5500-6000K. Sometimes this looks natural, and sometimes it doesn’t.
As an example, we talked in a previous post about shooting a birthday cake full of lighted candles using natural light. With the white balance in auto mode – the camera will attempt to neutralize the red color of the candles, and give the scene a balanced daylight temperature. In reality, though, the scene would look more natural, and more compelling, with the candles casting a red glow all around.
Here’s where it gets a little confusing – so let me explain something. When your camera is set for any given white balance setting – it locks the color temperature in the camera to that setting. So anything in the scene either above or below that temperature will show in the photograph as either more blue or more red. Using the example above, if the setting on the camera is at “daylight,” the candles will actually show themselves in their natural uncorrected state, as they will be well below the 5500K temperature set in the camera, so they will glow yellow/red. You could temper this a little by lowering the temperature of the scene by using the “incandescent” setting, which sets the temperature to 3200K. If the candles’ color falls below 3200K, they will look yellow/red to the degree that they fall below that number. But if they are burning at 3200K – they will be white!
As an exercise, set your camera to the daylight white balance setting – and go around photographing different light sources. Whatever you see in the photo is the actual color of the source at this setting. Cloudy days will show as bluish, light bulbs as yellowish/red, florescent lights as green etc. This allows you to get a feel for the actual color of the source, and how it affects the look of your photographs. Just remember that what white balance does (in auto mode for instance) is add the opposite color to those sources to get a “daylight” temperature.
One final observation regarding color. Most digital cameras ship standard with an infrared filter over the sensor to offset the color cast of this wavelength (unless specifically made without one). There may be times, however, when it would be appropriate to use an infrared filter over the lens to compensate for higher amounts of this light, such as at higher elevations for instance. I live at 3500 feet and usually end up much higher than that for many of my photos, so I use one.
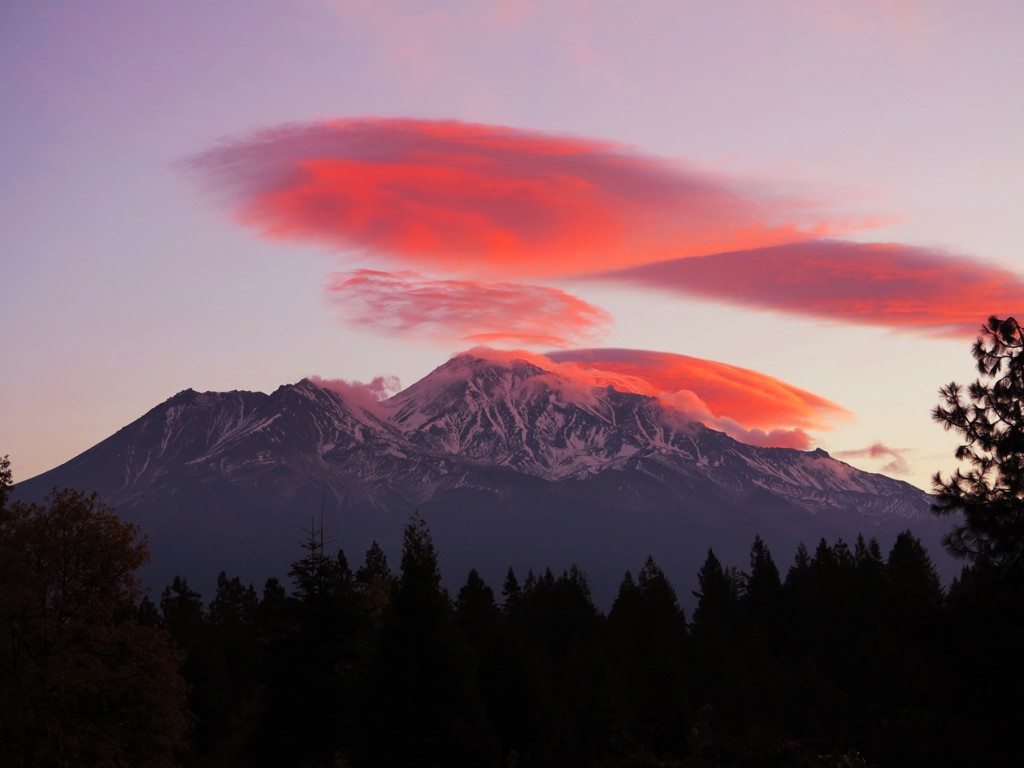
Sunset over Mount Shasta – G1X
The last part of this topic is intensity. There are some things that intensity of the light will effect, which we will be talking about in the next post, but the main thing I want you to recognize is that intensity does not affect the quality of the light itself. In a controlled studio setting, for instance, I can photograph a subject with the same set up at three different levels of intensity, adjusting the camera to compensate, and you would not see any difference in the light on the subject. Stronger intensity doesn’t make a light source “harder” for instance and visa versa. This is a common misconception, so remember the example above regarding going to the sun in your spaceship. The distance and size of the source is what changed the quality of the light – not the intensity! I will go over what intensity does change in the next post.
Conclusion
So that will conclude the first part of this post. Just these three topics provide much food for thought. Consciously using these three things, (subject, composition and lighting) will dramatically improve your photos. In the next post – part 2 – I will cover some of the mechanics of what your camera is doing in the background as you are snapping away in auto mode, and how to bring some of those controls to bear for making better pictures. We’ll cover focal length, aperture, shutter speed, ISO and how they interact together to affect your final image. Stay tuned!
Shameless Plug
You can support this site by using the links on this or any other page to get your stuff from Amazon or Adorama! Bookmark the page once you have clicked on the link and each time you purchase something it will contribute to more articles and information. Likewise – you can donate via Paypal as well here:
Thank You!


