We’ve so far covered three of the basic and most important aspects of what make a photograph; composition, subject matter and light. I want to emphasize that these three elements are independent of camera functions, and can improve your photos, even if you never take your camera off of the automatic setting. I just spoke with a friend who had purchased a Sony RX100 for a ten week trip traveling through Italy and Greece – and I was interested to hear what she thought of the camera as far as function and operation. What she said was typical, and is part of why I am writing this. Her response was: “It was great, and worked perfectly. Of course I have no idea how it really works, and I just left it on Auto the whole time.” Admittedly, she is not a “photo buff” and so I totally understand. This is why knowing the first three aspects discussed in Photo Primer Part 1 (and a fourth one mentioned below) are so important, as they can really make a difference even when shooting totally in automatic mode.
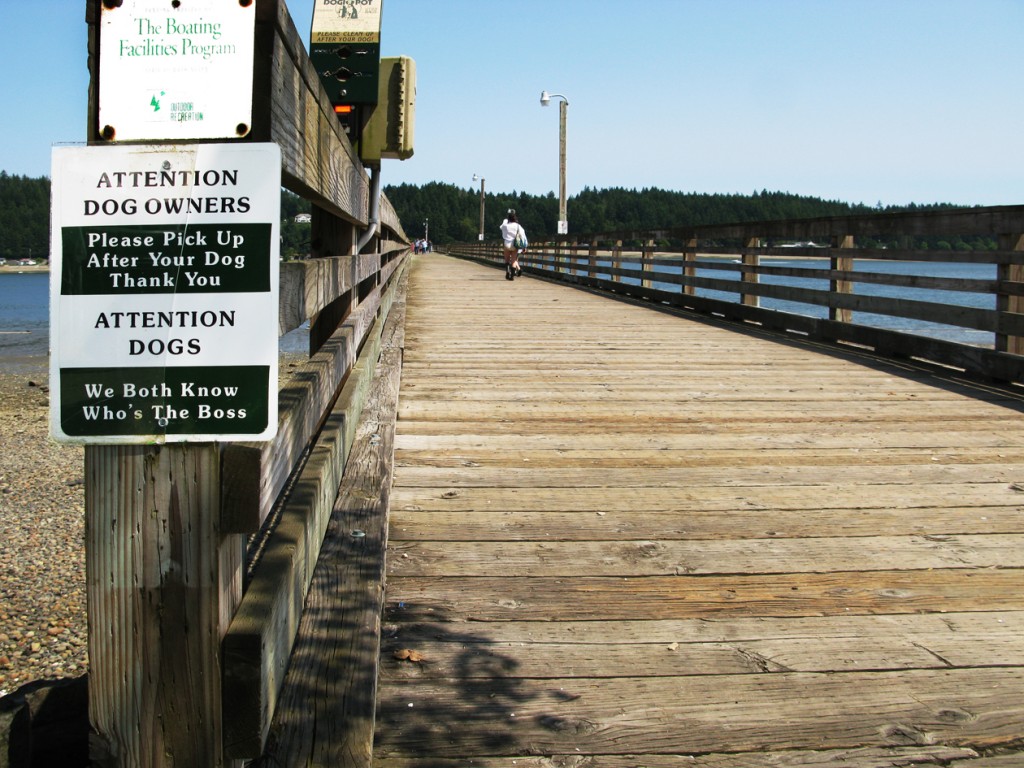
Snapped in Auto Mode – 12/31/12, Canon G1X
What I would like to do now is cover some of the other tools at our disposal for making a better photograph. While the first three were not dependent on the camera per se, these next few are the result of camera functions, and work in conjunction with what was discussed in Photo Primer Part 1.
Every camera comes standard with the ability to regulate the amount of light entering the lens, the amount of time that is allowed for the light to expose the sensor, and the sensitivity of the sensor itself as a means of achieving a properly exposed photograph. What we will be looking at in this segment is the effect these functions can have outside of just exposure. Once you understand what these functions do, and what they affect, you can use them consciously to create a better image.
One of the fascinating aspects of photography is its requirement of both creative and technical skill. Without the technical background, there is less room for creativity. So in this segment we’ll be looking at a few of the technical aspects of how your camera works and how you can take advantage of that in a creative way.
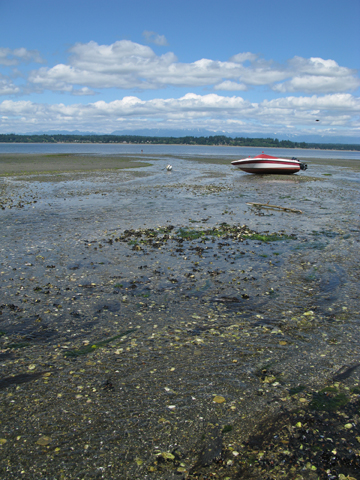
Here is an example of extreme depth of field with a wide angle lens selection – see below for explanation…
The Lens
To begin, let’s take a look at the lens. You wouldn’t have a very functional camera if there weren’t a lens attached, so it must be an important part of the camera, and it is. What the lens does is focus the light onto the sensor to create the image. All lenses have what is called a focal length. This is the distance from the front of the lens to the focal plane – which is where the image comes into focus. So let’s look at some of the characteristics of focal length first.
There are several things to consider here. The first is that focal length has a direct relationship to the field of view, or in other words, how much of the scene is recorded onto the sensor. “Short” focal length lenses create a wide field of view – thus the term “wide angle lens.” Long focal lengths create a narrow field of view and are thus called “telephoto” lenses.
There are a few other factors though that also need to be considered when talking about focal length. First is the “coverage” of the lens – which is how large the image circle is at the focal plane. Long focal lengths have large image circles and short focal lengths have smaller image circles. What this means is that the larger the sensor size, the longer the focal length of the lens needs to be to cover the entire sensor. This is why a “normal” lens for an 8X10 film camera is 300mm and a “normal” lens for a full frame DSLR camera (24mm x 36mm) is only 50mm.
Modern lenses are designed to create image circles of adequate coverage for the cameras they are designed for, no matter the focal length, which is why you can still use a 14mm lens on your full frame DSLR. The reason this information is important will become apparent as we go on, so stay with me here. So what changes with focal length is the field of view in relation to the sensor size. Remember this for later.
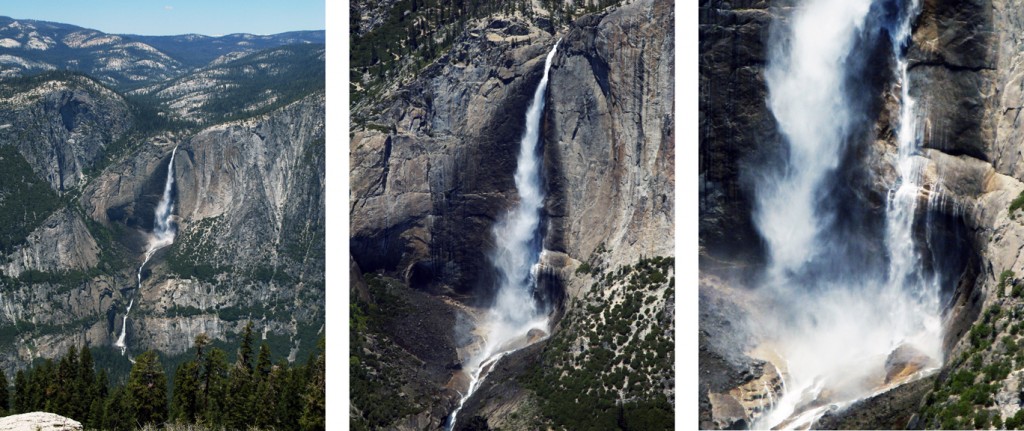
Here is an example of a wide angle view, a telephoto view and super telephoto view using the digital zoom (Canon G9)
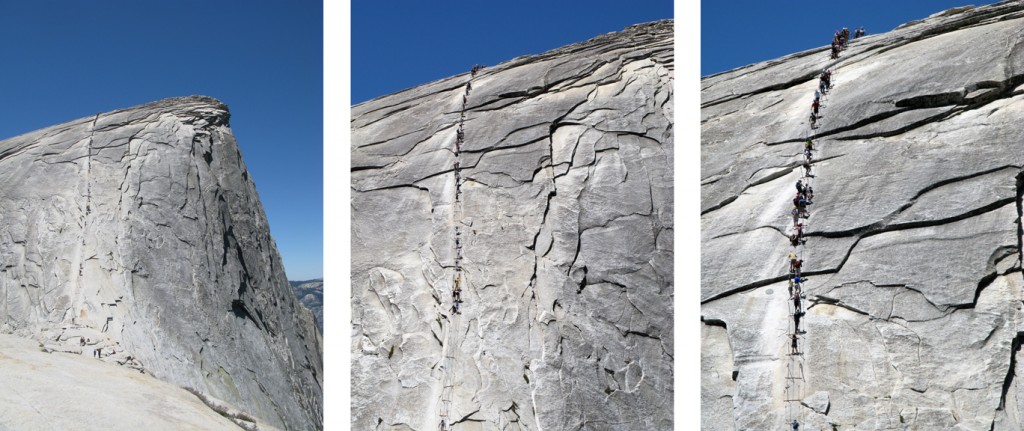
Here is another example of a wide, medium and telephoto view all taken from the same spot. (People going up the cables on half Dome, Yosemite. Canon G9)
There are two other physical attributes that all lenses possess: maximum aperture and depth of field, and they are both interrelated. The maximum aperture is the focal length of the lens divided by the size of the front lens element, and the number representing this relationship is called an “f-stop.” So for example, a 50mm lens with a 25mm front element would have a maximum aperture of F2.
The term “f-stop” is a term that has been left over from the old days when lenses didn’t have a mechanical diaphragm and so physical “stops” were placed over the lens to cut down the amount of light that was entering. These were metal plates with various sized holes drilled into them. Today, we can control the aperture with a mechanical iris built into the lens, either from the lens itself, or in the case of a compact camera – electronically from within the camera.
What the mechanical diaphragm does is two things; it regulates the amount of light entering the lens, and also affects the depth of field of the lens. Depth of field is simply another term for “depth of focus” and refers to the amount of the image in focus from near to far. Larger f-stops create less depth of field, while smaller f-stops create more. So lenses with large maximum apertures allow more light into the lens when fully open while having less depth of field compared to the same focal length with a smaller aperture.
Depth of field is a side effect of focal length also. Short lenses inherently have more depth of field than longer lenses. So for instance a 20mm lens at F4 will have most of the image in focus, while a 300mm lens at F4 will have very little in focus. This fact becomes important when we consider that a normal lens will vary depending on sensor size. So when the first digital DSLR’s came out with a DX sized sensor – roughly half the size of a 35mm frame of film – people didn’t really think about this much. But the reality is that a normal lens of 35mm on a DX camera has very different characteristics than a 50mm lens does, which is the normal lens for a full frame camera. It will have more depth of field, and likely a smaller maximum aperture. This becomes really apparent on a small pocket camera with a sensor the size of a postage stamp! Short lenses are the order of the day here, along with all of the inherent characteristics that come with them.
Because of this, point and shoot cameras are really good at getting everything in focus, and not so good at blurring out the background. Some of the newer cameras are coming out with faster lenses to compensate for this, which helps, but doesn’t really change the fact that the normal lens focal length for a small sized sensor is still a very short lens. Another physical factor of focal length is that the closer the focusing distance, the less depth of field. So macro shots for instance have very little depth of field due to the close focusing distance, and will need a smaller aperture setting to get more into focus.
Macro, like telephoto, has inherently less depth of field due to the high magnification of the image. Canon G9 – macro mode.
A wide lens setting with a small aperture creates a large depth of field, near to far. Canon G9
So as for the topic of lenses – just remember that the focal length and maximum aperture is what determines how much light the lens will let in as well as the amount of depth of field (or lack thereof) it will be capable of. So for example, if you are looking at a small sensor compact with a zoom range of 24mm – 110mm (equivalent) with an f stop of f2 – f5.6, you won’t have much ability to isolate your subjects. A better choice would be something in the same zoom range with a maximum aperture of f1.8 – f3.5. Remember that taking both focal length and aperture into consideration, the longer the focal length and lower the f-stop number, the less depth of field. This is why you see those giant lenses at sporting events – they bring the subject up close with a maximum amount of light transmission, which requires a very large front lens element. So for telephoto shots that isolate your subject and still allow the maximum amount of light into the camera – go for a “faster” f-stop at the long end – which means a smaller number. Another option is to go for a bigger sized sensor, which requires a longer lens and will thus have less inherent depth of field.
The Shutter
In the old days – all cameras had to have a shutter either in the lens itself (in the case of 4X5 cameras for instance) or in the camera. What the shutter does is regulate the amount of light that hits the film to create a proper exposure. In the case of digital pocket cameras – the shutter has largely been replaced with an electronic version that simply turns the sensor on and off for a certain amount of time to get the proper exposure. To compensate for the lack of a mechanical shutter, which makes an audible sound, digital cameras allow you to choose a sound for the non existent shutter! This is a good thing, as it allows you to get a feel for when the actual photo is taken and to know that it has actually happened.
Along those lines is another important topic that I did not mention in part 1, but is appropriate to mention here – even though it really falls into the category of non-camera functions – and that is the concept of timing. Small cameras such as the first 35mm Leicas created a great opportunity for photographers to concentrate on the timing of the photograph – as the large clunky sheet film cameras were not well suited to this. Digital compact cameras are small and generally pretty fast at focusing, and so timing becomes a photographic tool not to be discarded. You won’t have the precision of a mechanical Leica (unless you happen to be using one), so you might have to practice with how long it takes for your particular camera to get the shot once you’ve pressed the shutter release button. Some can have a pretty lengthy delay, so this is yet another thing to look for when considering a new digital point and shoot.
I thought this raven in the cemetery was interesting – he only spread his wings for a split second before taking off!
Timing is not just pressing the shutter button at the right time – it is also planning ahead and being where you need to be at the right time to get the shot. This might be researching when and where the moon is coming up or going down, or the time the tide is coming and so on. Like the other non-camera functions, proper timing can make all the difference, even when shooting in auto mode. When you think about it – a large number of good photos are the result of being at the right place at the right time to get the shot.
Hawaii Sunset – Canon G2
Getting back to the shutter as a mechanical function of the camera, the speed of the shutter is set automatically by the camera when in auto mode and goes mostly unnoticed. What I want to do here is show you how you can use shutter speed as a tool, beyond just considering the timing aspect, and to know what your camera is doing with it.
Since shutter speed regulates the amount of light hitting the sensor, and the aperture of the lens regulates the amount of light entering the camera, these two functions work together to keep the exposure accurate. We’ve already discussed the effects of the aperture on depth of field – so let’s look at what the effects are of the shutter speed. For one, the shutter speed works to eliminate camera shake. The higher the shutter speed, the less likely camera shake will effect your photos – and this is particularly important if using the long end of your zoom. The longer the focal length of the lens, the more the camera shake is magnified, and the higher your shutter speed needs to be to counter it. A common formula for this is to use a shutter speed that is the inverse of the focal length of the lens, i.e. 1/200th of a second for a 200mm lens as an example. This is again why those lenses the pros use at sporting events are so big. Not only is it necessary to isolate the subject, but to keep the subject sharp, there has to be enough light entering the camera to allow a relatively high shutter speed.
There are lots of ways to use shutter speed to your advantage. Obviously, a high shutter speed allows action to be frozen in time. This is particularly effective when used in conjunction with a long focal length lens to isolate your subject and if used with the proper timing (as mentioned above). But less obvious are the effects of a slow shutter speed. Slow speeds allow the movement of things to be recorded as flowing. You have no doubt seen the smooth blurring of moving water in a stream from the use of a slow shutter speed. Many cameras have a built in neutral density filter to facilitate just this sort of thing. Anything that moves in an otherwise static environment becomes a focus of attention – as in a blurred train passing a train station in sharp focus.
Fire Dancer – using a slow shutter speed. Canon G2
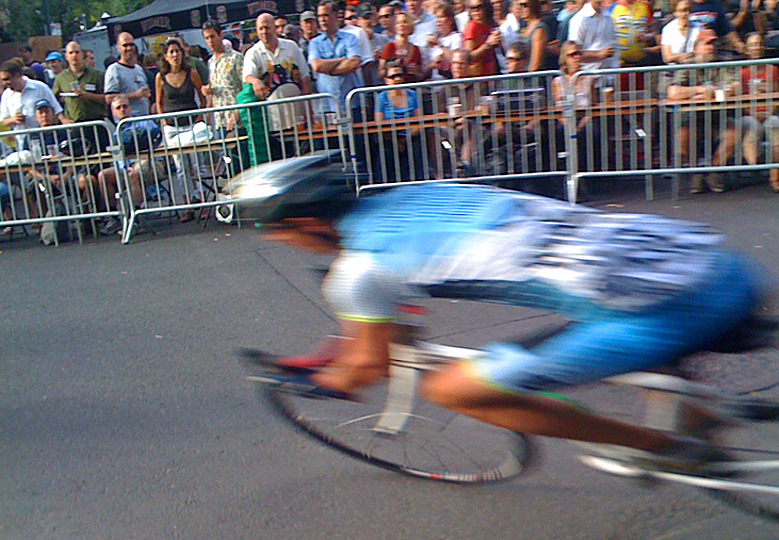
Another way to use a slow shutter speed to your advantage is to pan a moving subject, such that the subject itself remains sharp, while the background becomes blurred – the opposite of what was described above. The key is of course knowing what your camera is doing with the shutter speed in relation to the mode you are using, or to be able to set your camera up manually for exposure. Ideally, you should have the option to choose shutter priority mode – which will adjust the aperture for proper exposure to match the shutter speed you choose.
This was from an Iphone. Note that even though I was panning the camera that the wide lens left the crowd mostly in focus, and the speed of the biker moving past was faster than the panning motion and thus created motion in the subject.
Another thing to consider with shutter speed is that wide lenses are more forgiving than telephoto lenses when it comes to camera shake. So you can often get away with a very slow shutter speed with a wide lens, and still get very sharp results handheld as long as the camera is supported properly. You will see the effect of this as you zoom out to the longest focal length of your lens – and particularly if you have a digital zoom – and it becomes harder and harder to keep your subject steady on the screen.
ISO
ISO stands for “International Standards Organization” and refers to the sensitivity of the sensor to light. Back in the days of film, it was referred to as ASA (American Standards Association). The higher the number, the more sensitive to light the film was. With todays digital cameras, this value is adjustable right on the camera. The values listed are on a logarithmic scale, such that twice the value results in twice the sensitivity. Light, however, follows the “inverse square” law, which means that light intensity is inversely proportional to the square of the distance. So for example, a light source that is moved twice as far away from what it is falling on will only be 1/4th as intense. This means that to increase the exposure one stop, there must be twice the amount of light, and to increase the exposure two stops, there must now be four times the amount of light and so on. The same applies to sensitivity. To increase exposure one stop the sensor must be twice as sensitive, but to increase it two stops, it must be four times as sensitive and so on. So to increase exposure two stops from an ISO of 100, we must go up four times to ISO 400 as an example.
When using ISO to increase exposure, the inverse square law drives up the ISO values quite high very quickly! Fortunately for us, each year brings better sensors with higher sensitivities and better quality images. The DSLR manufacturers have gotten really good at this, with both Canon and Nikon generating crazy high ISO’s up to 204,800! You will not see these kinds of numbers in a small digital camera, due to the small sensor size, but ISO’s of 1600 are common and image quality can be acceptable in some cases even at these high values. The larger the sensor size, the better the image quality at higher ISO values. As mentioned in my previous article on how your camera works, cross talk in smaller sensors is amplified as the sensitivity gain increases, generating noise in the image. The more pixels that are on the sensor in relation to size – the more prone it will be to noise at higher ISOs. Even the full frame sensor of my Nikon D800 cannot produce noise free images at high ISO values with 36 million pixels packed onto the sensor. You can only imagine what software convolutions are necessary to get decent images from a small sensor at high ISOs – particularly if it has a large number of pixels in relation to its size.
As counterintuitive as it appears, I actually get cleaner digital files from my 4 megapixel canon G2 than I did from my 12 megapixel G9. Bigger pixels mean less noise – but fewer pixels mean less resolution, so there is a compromise here for every camera between sensor size and the number of pixels. ISO affects this compromise as well, since the more sensitive the sensor, the more noise there is, which creates less resolution, particularly if noise reduction software kicks in (which happens automatically on most point and shoot cameras).
So as you can see – a higher ISO setting is not always the best solution when the light gets low. Usually, there is a compromise between aperture, shutter speed and ISO that produces an acceptable image. The various mode settings on the camera will usually make these compromises for you in the background – and they will almost always float the ISO up to unacceptable levels unless you’re careful to keep this in check. Some cameras allow you to set the maximum ISO that the camera will use in a given mode – and this should be set to something reasonable for your particular camera. Before I wised up to this – I found my Canon G1X floating the ISO up to values of 1000 and beyond in bright sunlight while in auto mode. This is not what you want for noise free, clean images! Other modes don’t float the ISO at all – and will leave it where you set it – which is what I prefer. I will always go to shutter speed and aperture to get the correct exposure before moving the ISO up. Having said that though, I am not afraid to move it up if necessary – if keeping the shutter and aperture where they are is important to the image I am creating.
Conclusion
So what we have in these settings is a delicate balance between not only the mechanical functions that control the exposure, but esthetic considerations associated with each of these functions as well. Knowing what each function does esthetically is important to creating good images. The balance occurs in choosing which function is most important in creating your image, and adjusting the others for getting the correct exposure. So depending on what you’re after, you may need to bring into play focal length, aperture, shutter speed and ISO all at once to get the image you seek. Knowing how to do that on the camera you’re working with is crucial.
As mentioned, some cameras do not have a strictly manual mode, but will still have something that will incorporate all of the elements mentioned above. Check the manual and see which functions are favored over others. Don’t always assume that what the mode implies is what you will be needing it for. As an example, a “night scene” mode will emphasize a wide aperture, higher ISO value and a slow shutter speed, which might be exactly what you want in a completely different circumstance, like inside using natural light. Likewise, you may find yourself outside on a nice sunny day looking at a bunch of flowers and choose to use the “portrait” mode instead of the “scenic” mode, etc. It all depends on what those modes are doing and what you want to achieve.
Shameless Plug
You can support this site by using the links on this or any other page to get your stuff from Amazon or Adorama! Bookmark the page once you have clicked on the link and each time you purchase something it will contribute to more articles and information. Likewise – you can donate via Paypal as well here:


